Adding, editing, or cloning reclass definitions
The Reclass Definitions page allows you to view and configure reclass definitions, including setting the order you want the system to process them, and selecting the department or accounts in which to reclass dollars from and to. You can create a new definition by cloning an existing definition and editing it.
To add, edit, or clone reclass definitions:
-
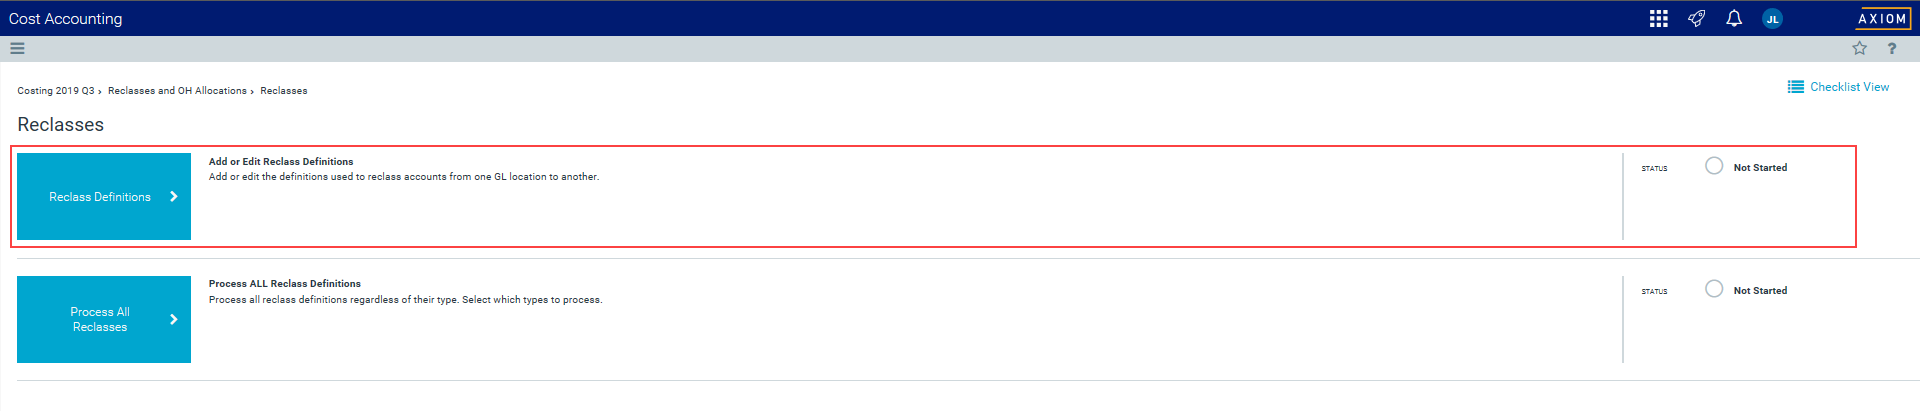
In the Guide View, click Reclasses and OH Allocations > Reclasses > Reclass Definitions.
Click image to view full size
-
To show or hide inactive definitions in the list, click the Show only active definitions check box at the top of the page. If you unselect the check box, the table displays the inactive definitions shaded in yellow. Only active definitions include a check mark in the Active column.

- Do any of the following:
To add a definition, do one of the following:
- If you are not yet sure in what order to place the new definition, click Add New Reclass Definition at the top of the page. The system places the definition to the bottom of the list of active definitions.
- If you know where to place the new definition in the list, select a definition to highlight it, and click the plus
 icon. The system places the definition after the existing definition.
- To edit a definition, select the definition to highlight it, and click the notepad
 icon.
icon. - To clone a definition, select the definition to highlight it, and click the notepad icon. In the Edit Reclass Definition dialog, click Clone in the bottom left corner.
- In the Add New Reclass Definition dialog, select the type of definition to create, and click OK.
-
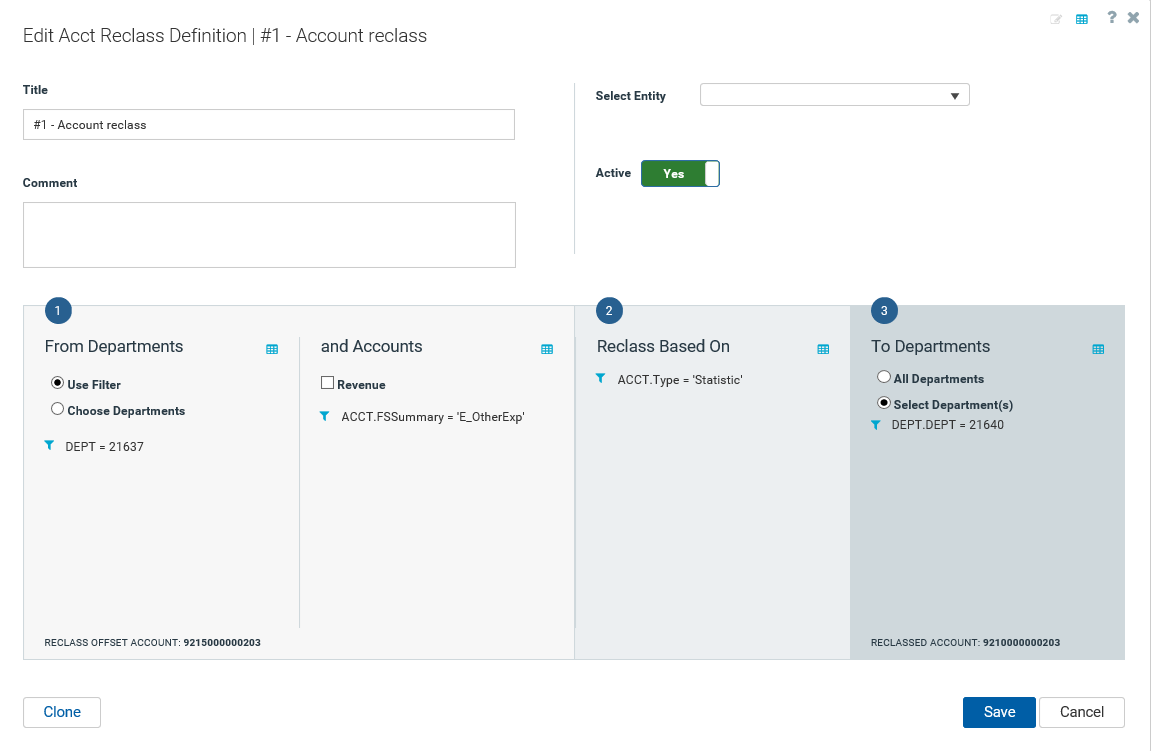
In the Add/Edit Reclass Definition dialog, complete the following:

Click image to view full size
Field Description Title Title for the definition. Comment Details for the definition. Select Entity Select the entity in which to allocate dollars from.
TIP: The entity you select determines the departments and accounts you choose from further along in the utility.
Use Source Cost Categories Do one of the following:
- To create the pseudo account for all of the cost categories for your target departments, click the toggle to Yes. The system will create the pseudo account for all of the accounts you select further on in this utility.
- To create only one pseudo account, click No.
Cost Category If you set the Use Source Cost Categories toggle to No, select the cost category in which to apply the pseudo account.
Active Do one of the following:
- To activate the definition, click the toggle to Yes.
- To deactivate the definition, click the toggle to No.
For more information regarding this option, see Activating or deactivating reclass definitions.
1. From Departments Select source departments to allocate dollars from by doing the following:
- To create or use a filter, do the following:
- Click Use Filter.
- Click Add Department Filter to open the Filter Wizard.
- Create or select an existing filter.
- To select from a list of departments, do the following:
- Click Choose Departments.
In the Add Departments dialog, do any of the following:
- To select all of the departments, click Select All.
- To unselect all of the departments, click Select None.
- To search for a specific department, type a department number or name in the Search box.
- Click OK.
To preview the filter results, click the spreadsheet icon
 .
.and Accounts Select the account(s) to allocate by doing one of the following:
-
To apply the definition to revenue accounts only, select the Revenue check box.
NOTE: This does not apply to Payroll Reclass definitions.
- To select the accounts, click the funnel icon
 to use the Filter Wizard to create or select an account filter (For example, Account.Type = Expense).
 - To preview the filter results, click the spreadsheet icon .
2. Reclass Based On Configure the statistic account(s) in which to reclass by clicking the funnel icon
to use the Filter Wizard to create or select an account filter. To preview the filter results, click the spreadsheet icon .3. To Departments Do one of the following:
- To allocate to all the departments based on the criteria selected in the Allocations Based On section, select All Departments.
-
To allocate to specific departments, select Select Department(s), and click the funnel icon
to use the Filter Wizard to create or select a department filter. - To preview the filter results, click the spreadsheet icon .
NOTE: This option does not apply to Payroll Reclass definitions because the reclass is automatically applied to all payroll departments by default.
- After you finish making changes, click Save.
-
To preview the definition results, click the spreadsheet icon
at the top of the definition window.
Click image to view full size
-
To return to the definition, click the notepad icon
 at the top of the preview window.
Click image to view full size
- After you finish adding or editing definition(s), review and edit the definition processing order, as needed.


When you are ready to move the reclass dollars, process the definitions.
